Recently, I have been working on a project to test the inter-operability of Microsoft tool-sets with IBM services and queuing. Having a local MQ server was something that I found very valuable for testing. I found that the install of WebSphere MQ and basic setup of a development MQ server to be sensitive. After a couple days and some guidance from IBM developers, here is what I came up with as steps to install a local WebSphere MQ server on a Windows 7 machine, and things to avoid. Keep in mind these steps are for a local development server. Please do not use these steps for a production system as it will leave you system open to anyone to do as they wish.
Step 1 (Download and install):
I downloaded WebSphere MQ 7.5 software from IBM. I would not attempt to install this on a windows profile based on a domain account. Create a local machine account and put it in the administrators group. I had issues when trying to install under a domain account on my machine, so I would say avoid this. Make sure that once you create the local user account and give it admin rights, log over to that profile and then begin the install.
Step 2 (Network setup):
Once the install wizard begins, you will see a screen like below. Click on the “Network Configuration” in the left panel and select “No” for configure a domain.
Once done, then click on the “WebSphere MQ Installation” in the left panel. Once you do this, the screen will change to like below.
From here, click on “Launch IBM WebSphere MQ Installer” for the installation to continue.
Step 3 (Installation level you wish):
While I did not show this, you can customize what is installed, or just take the typical. I installed everything just in case I need it tomorrow, I need not worry it is already there.
Step 4 (Instance name) :
Once the initial install is complete, the following dialog below will be shown. This is because a server can support multiple installations of WebSphere MQ. I called my instance DEVMQ. Since this was a local installation and the only one, I made it the primary installation.
Once you click on next, you will get a screen asking if there are any domain controllers. Since this is a local development installation, select “No” and click next. Once beyond this screen, the installation should finish. Once it is finished it will launch the “Prepare WebSphere MQ Wizard”. Just exit out of this, we will prepare it later.
Step 5 (User Group Changes):
Once the installation is finished, go into the computer management and add the user that you are logged in with into the “mqm” group. This group is what WebSphere uses to know who is allowed to manage the MQ instance. Without this, some of the commands that need to happen can not be executed by this user. At this point reboot your machine. If you do not, then all the changes from the installation and changes to group membership will interfere with being successful in following steps.
Step 6 (Prepare MQ Wizard):
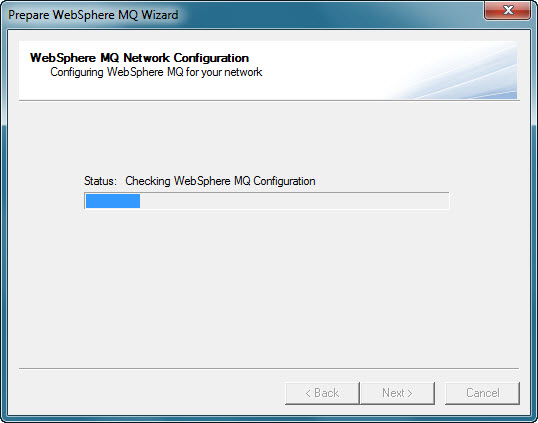
Once rebooted, in order to be able to start setting up a queue manager and queues, you need to launch the Prepare MQ Wizard. This will be located program/IBM WebSphere MQ. The following screen will show as it inspects your network configuration.
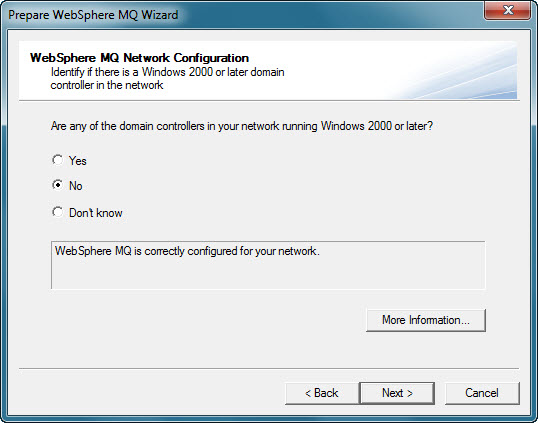
After completed the inspection, the following dialog will show. Please select the “No” option since we are creating a local development installation of MQ.
Once this is complete, it will ask to launch MQ Explorer, which you should be able to do now and to begin the setup of queue manager, channel, and queues.
Step 7 (Creating a queue manager):
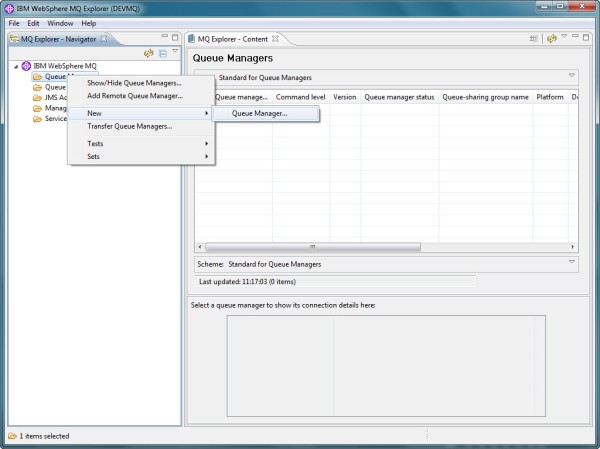
If you are not already in MQ Explorer, open it up and you will see something similar to below. Follow the image below and right click to create a new queue manager.
Once you click to create a new queue manager, a screen like below will show. Fill it out like I have it below. Please keep in mind that WebSphere MQ is case sensitive, so if you decide to change any of the names, it is probably best to keep them all in caps. Also make a note of what you name things as these will be important when you are connecting to put or get messages. Also, make sure the dead-letter queue is spelled exactly as below, as this is a system defined dead-letter queue and will not work if spelled incorrectly.
You should be able to click on finished at this point, and you will see a screen like below where the queue manager is being started.
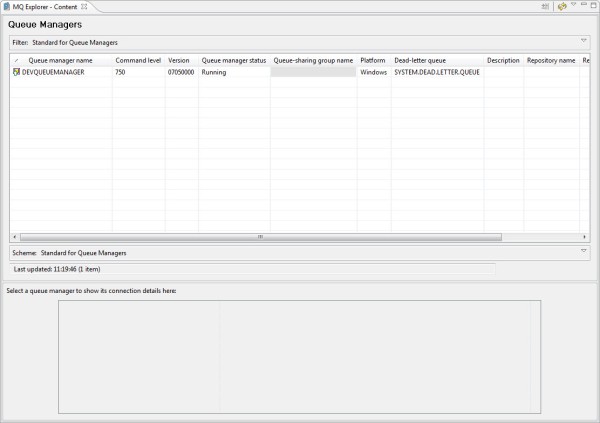
Once the queue manager is started, you should see MQ Explorer with the queue manager showing similar to below.
Step 8 (Setup channel):
Once the queue manager is created, go to the left pane of MQ Explorer and create a server connection channel as is below.
Once you click to create a server connection channel, the screen below will come up. You can name this as you wish, just keep in mind it too is case sensitive.
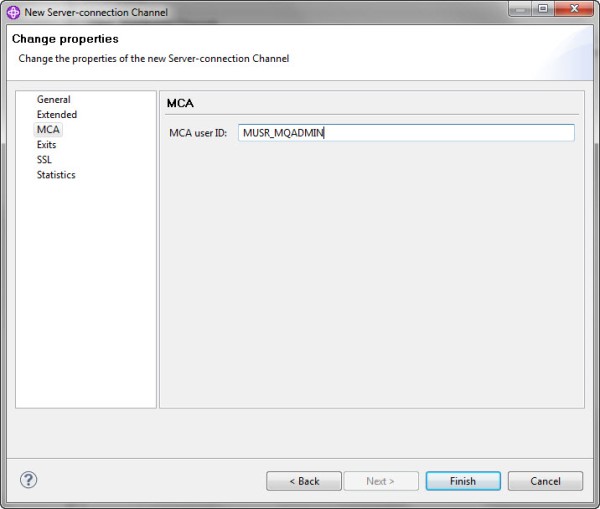
Click on next. A screen like below will come up. Navigate in the left bar to the MCA and enter the MCA user id exactly as below. This user id is an id that WebSphere MQ creates to manage everything. What you are telling this is, when someone hits the queue, impersonate this user. This would be a big no-no in a production environment!!
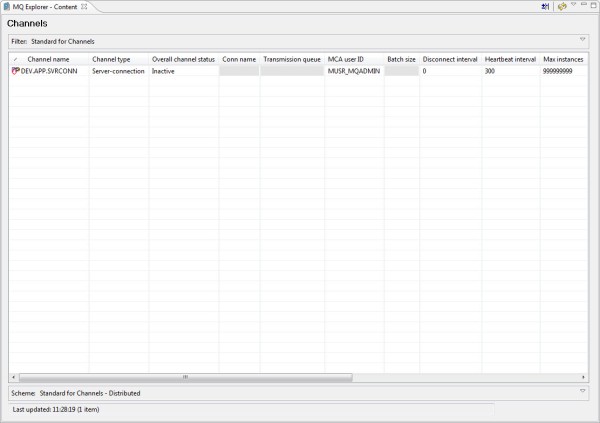
Once this is filled in, you can click on finished which then should show something like the following upon the channel being created.
Step 9 (Queues setup):
Once the channel is created, navigate like below to create a queue from the context menu.
Create a local queue. I create one called REQUEST and one called REPLY. This would be for a situation where there is a request / response from the calling client, but the queue does all the routing. It can be as easy as to create one queue called REQUEST. Just as a note, if you have a client with a contract expecting a request / response, both a request and reply queue will be needed.
Step 10 (Turn off client authorization):
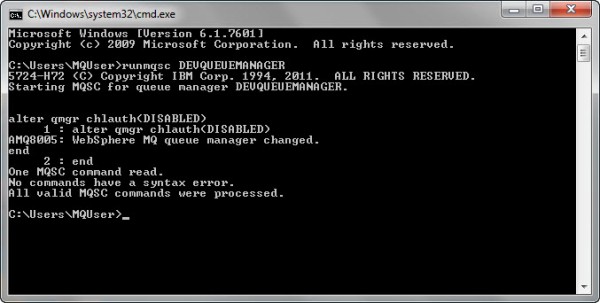
The final step is to turn off client authorization, so that way MQ does not reject clients connecting. By running the command below at a command prompt, it will turn off client authorization for a queue manager. If it says that you are not authorized, it is likely because the user you are logged-in as is not in the mqm group, or that you have not logged out and back in.
At this point, you should be able to login as anyone on your machine, and pass or listen to messages.
Please keep in mind this does not go into the finer points of security on MQ or how to do the connection with another client. I plan on following up with how you can connect using .NET 4.0 WCF client in a future post.


